
If you could spend one afternoon on a marketing strategy that increased your revenue by 34%, would you do it?
Automated email marketing is the key. According to Pardot, that’s how much surveyed companies increased their revenue when they adopted marketing automation. The most powerful type of marketing automation is drip email marketing. We’re going to show you how to set up a simple drip email marketing campaign in our CRM, Insureio – if you use a different CRM or email marketing software, the process is probably similar. Feel free to use our steps below as a starting point!
First off, let's do a quick review. A drip marketing campaign is a series of emails that go out to a client or prospect on a pre-determined schedule. You can use these campaigns to educate prospects, stay in touch with clients, or close a sale.
Ready to get started? Let's dive into Insureio and get a campaign created!
Step 1: Select or Create Your Campaign Materials
Creating a series of marketing emails designed to get your prospect to take action might sound intimidating at first. With Insureio, it doesn't have to be. Insureio includes a free library of pre-written, pre-formatted HTML emails to use. Use these emails in your campaign, or if you’re feeling creative, use them as a starting point and tweak them to your liking.
Here’s what our marketing library looks like.
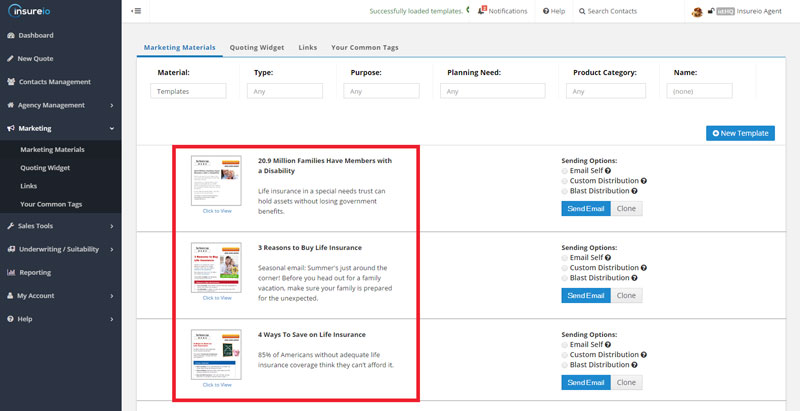
You can browse emails by planning need (income replacement, business planning, health & long-term care, etc.), product (disability insurance, life insurance, etc.), or the email’s title (handy if you already know which one you want).
You have three options for your campaign emails:
- Use existing emails. Jot down their names for easy reference when you’re in the campaign builder.
- Create new emails using the “clone” feature. Choose an email that has an image or message you like, then make it your own. Don’t forget to jot down the name so you can find it easily later.
- Mix and match! Don't be afraid to use templated emails in conjunction with your own. For example, you may want to create an introductory email that tells a prospect a little about you and your agency, and include it in an educational campaign about life insurance that uses the library's pre-written emails.
Step 2: Create Your Campaign
When you create a new campaign, assign it a name, along with a planning category and product category. Later, you'll be able to search for this campaign using either of these categories.
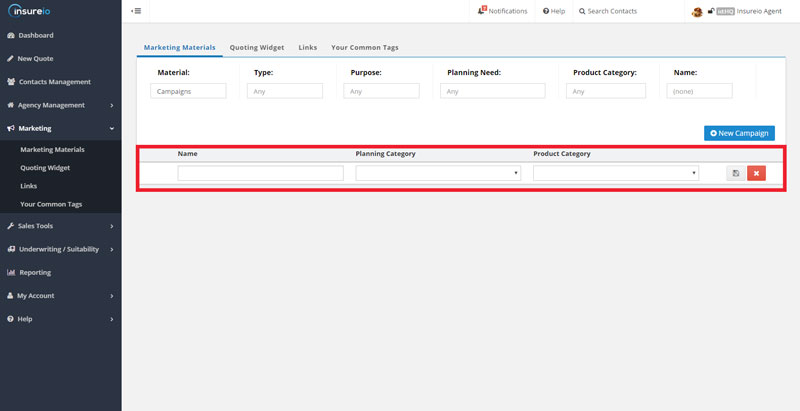
For the purposes of this post, let’s build a drip email marketing campaign to educate a prospect on cash value life insurance. I’ll name my campaign “Cash Value Life Insurance,” select a planning category of “Retirement Planning,” and a product category of "life insurance." Boom! That was easy.
Step 3: Build Your Tasks
In Insureio, campaigns are made up of tasks. Those tasks can be emails, call reminders, to-do list items, text messages – you name it. For this example, we’re creating an email campaign, so every task will be an email.
Here’s what the task builder looks like:
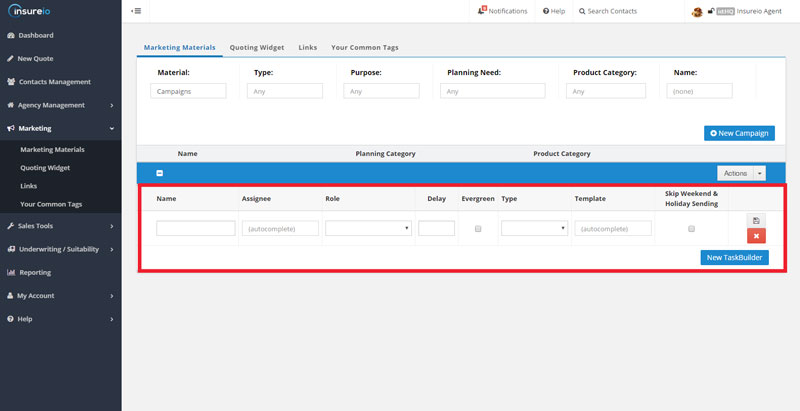
For each task, we need to tell Insureio what to do. Give the task a name (Email #1), and leave "Assignee" blank (this field is for managers who want to assign tasks to individual agents). We'll set the role as “system,” since this task will be automated and handled by the system without our input. We'll set the delay for the first task to 0, which means as soon as we enroll a contact in this campaign, they’ll get the email associated with this first task. For the task type, we select “email,” and then type in a template name. You can even choose to skip weekend and holiday sending, if you think that gives your emails a better chance of being opened. Once we hit save, the first task is complete!
A completed task in Insureio looks like this - you'll see all your choices displayed:
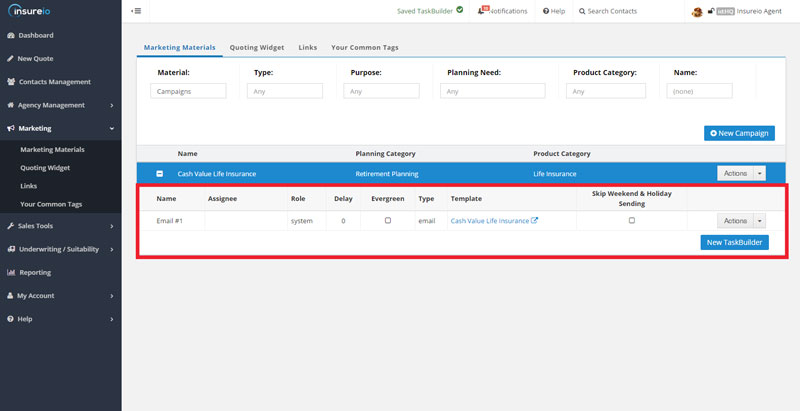
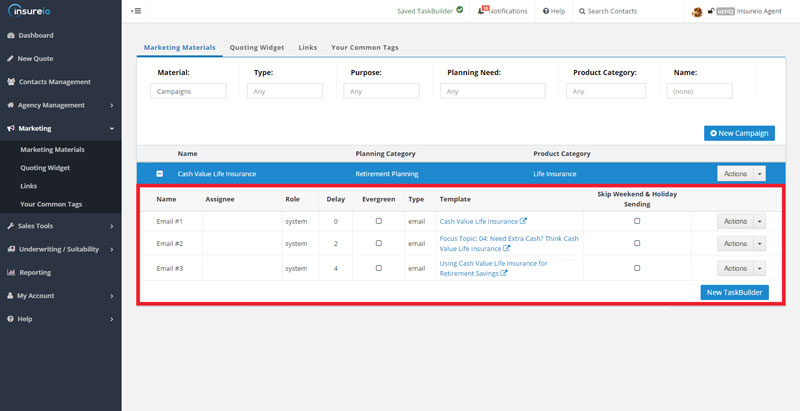
A drip marketing campaign can have as many tasks as you want. We’re going to add two more tasks for a total of three emails in our campaign. Let’s spread them out over a week to give our prospect time to absorb each email before they receive another. To do this, we’ll set each delay using a multiple of 2, which means 2 days will go by before the next task in our campaign fires. Over 6 days, our prospect will receive 3 emails from us.
Here’s what it looks like when we’re done:
Step 4: Enroll Prospects
You have plenty of options for choosing candidates to enroll in your drip marketing campaign. If you’re using a service like MailChimp or AWeber, you can create a mailing list and embed a signup form on your website or landing page.
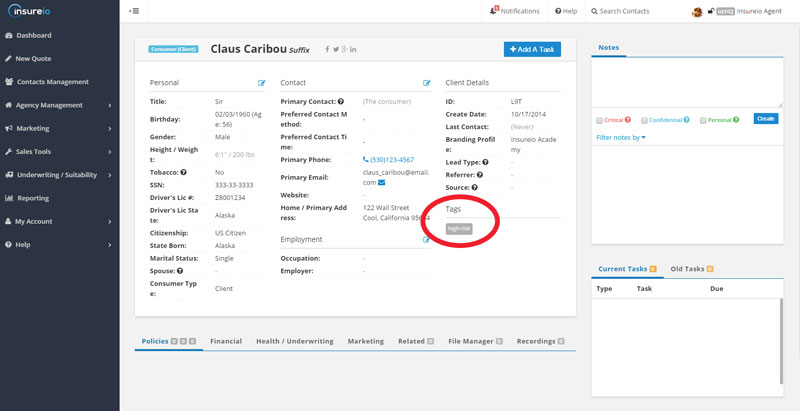
If you’re using a CRM, you have even more options. We use Insureio's tagging feature to tell us what product types and planning needs apply to a particular contact. For our cash value campaign, we could enroll contacts we've tagged with things like “retirement” or “college planning.” These folks are likely to be interested in the financial benefits of a cash value policy. Here’s what tagging looks like in Insureio. When you click into a client record, you can instantly see what they've been tagged with:
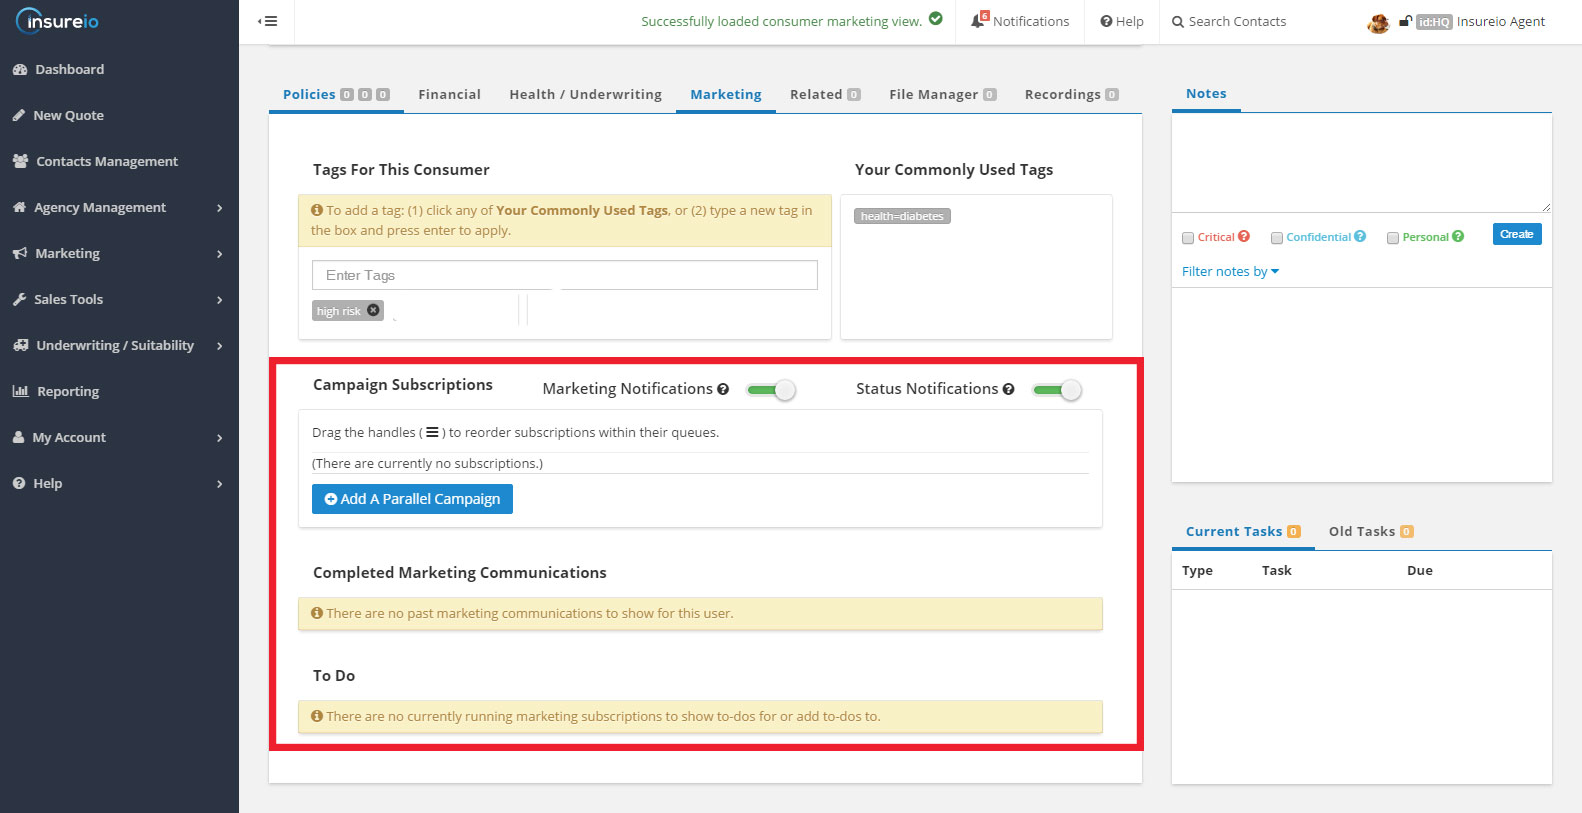
Also within that client record, you can see the in-progress and completed marketing communications for that individual:
Tagging isn't the only way to find the right audience for your campaign. Reporting is a fast way to pull together a list of recipients with a common bond. For example, in Insureio, we can create a report with all our prospects who got a quote in the past three months, but don't have a policy in force. Since our test campaign focuses on cash value life insurance, we could narrow that report even further to show us people who got a quote for whole life insurance, but still haven't made a purchase. With just a few clicks, we can save the results and enroll only those contacts in our cash value drip marketing campaign.
Step 5: Monitor Results
Once you’ve created your campaign and rolled it out to your recipients, set aside some time to track your results. How many of the people in your campaign took the action you wanted them to take? For example, if the overall goal of our cash value campaign was to sell policies, we’d compare the number of people enrolled in our campaign to the number of policies sold within the duration of the campaign. We could cross-reference those lists to see the exact names of the people who bought policies, if we wanted. Keep in mind that this isn't an ironclad metric — consumers may keep emails for days or even weeks before acting on them.
Luckily, reporting in Insureio gives us a lot of options to play with. You can create and save as many reports as you want, then run them after each campaign to see how your bottom line has improved. Here are just a few of the reports we have saved:

- All Closed Leads 2016
- All Closed Prior Month
- All Leads Current Month
- App Submitted Year-to-Date
- App Submitted Last 30 Days
- Approved Last Month
- Approved Last Week
- In Force Last Month
- In Force Last Week
In Insureio, once you save a report, you can re-run it anytime. The system will use your saved parameters, but fill them with the most current data. For example, our "All Leads Current Month" report gives us the most up-to-date number without having to select a new date range. If you know what metrics you want to track, spend an hour building those reports and you can use them for months or even years to come.
Automated Email Marketing Tips & Best Practices
Repurpose & Segment
Automated email marketing campaigns reward you for the time you spend in putting them together. Even if you’re not starting with a library of content in Insureio, you may have content you can pull from other places – a Q&A page on your website, a blog post you’ve written, etc. Remember, the more targeted your campaign, the more effective it will be. Sort through the content you already have, and see how much can be grouped or repurposed into campaigns based on planning needs and/or insurance types. Use your CRM or email marketing software's sublist or tagging feature to create segments within your book of business that you can market to.
Talk, Text, and Email
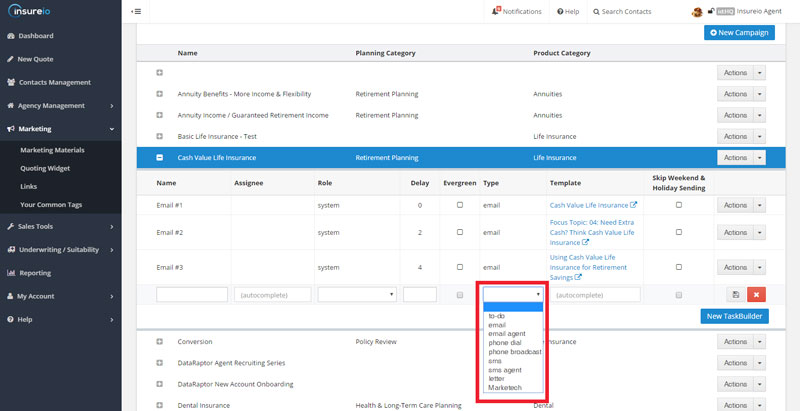
If you're working in Insureio, you can create campaigns that mix emails with phone calls. The system can automatically send the emails and texts for you, then prompt you with reminders to make the necessary follow-up calls. For example, you can create a campaign for new leads that includes a call, an email, a text, a follow-up call, and a final email. Here's what your options menu looks like - choose from a to-do list item, email, email to a client's agent, phone dial, text message, letter, and more.
If you're interested in this feature, let us know and we'll include a walk-through in a future Tech Corner post!
There's no limit to the number or type of automated email marketing campaigns you can create. Educational campaigns, marketing campaigns, campaigns that tie in with industry initiatives like Life Insurance Awareness Month - be creative! As long as you keep your clients' needs in mind and provide relevant and valuable information, you'll see a return on your investment.
