
Your website contains text, tables, and graphics that Google uses to figure out what each page is about.
But what if there were an easier way to just tell Google what it’s about? And what if you could tell Google that you wrote that content, even if you don’t post a byline on every page? Because when Google understands exactly what your page is about, you’re more likely to get a “featured snippet” in the search results. Your content is also more likely to show up in the search results for your own name.
The good news? There are multiple ways to implement schema on your website. In this post, we'll start with the easiest way - but with a caveat. This method only lets you apply limited schema parameters. For a more complete schema application, you may want to use one of the methods in the follow-up post. Yes, there are so many ways to apply schema that we needed two posts to cover the best ones. If you're not sure which method is right for you, wait until our second post on the topic has laid out all the alternatives for you and take your pick.
No time to read? Watch our video overview:
What Is Schema Markup?
Schema markup is an extra piece of code you put on a web page to give search engines more information about that page. It might be information about what that page contains, or who wrote it. This helps search engines understand when to display your page in their results.
For example, if a client Googles you, they want to see information about you and, if possible, by you. When you use schema markup on your website, Google knows which pages you’ve written and can display those posts or pages to users searching for you because it knows you’re the author.
This may sound obvious, but here’s an example to help you see what happens with and without schema markup:
- With schema markup: The algorithm knows you are the author of a particular page on non-med life insurance policies. It knows to display that page when someone searches for your name, even though your name might never appear on that page. The algorithm knows the searcher will be interested even though they didn’t type in “non-med life insurance policies” because you wrote it and they’re clearly interested in you and what you do.
- Without schema markup: The algorithm doesn’t know you wrote the non-med policy page on your website. True, it appears on a website that might have your name in the URL, but the keywords used most frequently on that page are not your name – not even close. So the search engine doesn’t automatically know it should associate that page with a search query for your name.
There are many types of information that you can highlight using schema markup. Not all of them apply to us, however – many are for things like recipes, movies, book reviews, and entertainment-related information. However, there are a couple types of schema that would benefit us, including the following:
- Article (including the author)
- Event
- Local Business
- Products
How to Create Schema Markup: Method 1
The easiest no-code way to do this is with Google’s data highlighter. This free tool works through Google Search Console. You must have Search Console set up for a verified website for it to work. Click here for Google's walk-through on setting it up.
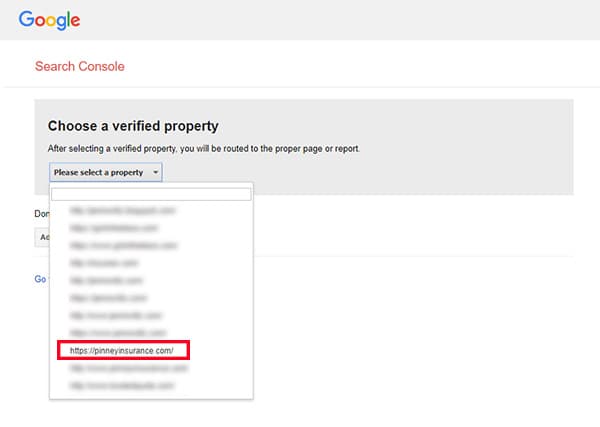
1. Click here to open the data highlighter tool. Select the website you want to work on:
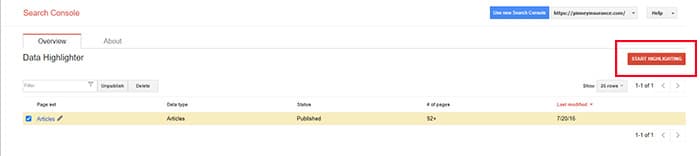
2. Click Start Highlighting on the right hand side.
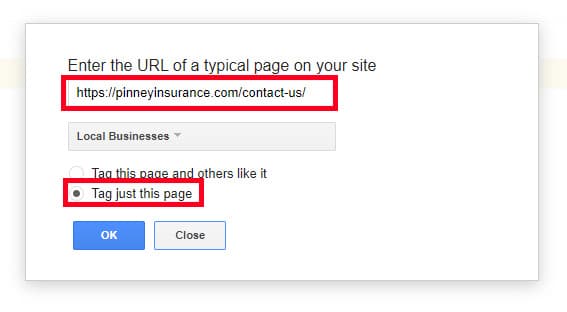
3. In the dialog box, it will ask you to enter the URL of a “typical” page on your site, and select the type of information to highlight.

This is the tricky part. What does Google mean by “typical”? This tool works in terms of “page sets” – meaning, pages that can be grouped together because they share formatting and some structured data. For example, you can select a representative blog post or content page and mark it up with as much of the available schema as you can, in the process we’ll describe below.
Next, Google will pull up other pages from your website and ask you to mark them up, too. This repetition teaches the tool how to view the remaining pages on your site. It will attempt to apply schema markup in the same way you selected it on the sample pages. If the page title is always at the top, for example, and you mark that up consistently on the representative pages Google shows you, it will know that’s where to find the page title for other pages it believes fits into that page set.
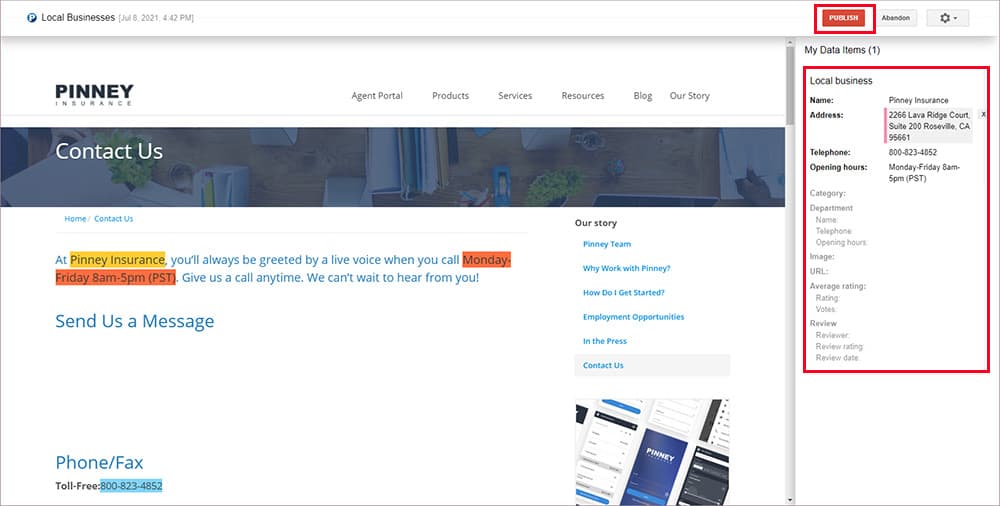
On the other hand, if you only want to tag a few pages – like your “Contact” or “About” page – with the “Local Businesses” schema, you might want to do them individually. In this example, we’re going to mark up our Contact Us page with the “Local Businesses” schema.
Mark Up One Page at a Time
1. Paste in the relevant URL and select to tag just that page or that page and others like it. Click OK.
2. Next, you’ll see a replica of the URL you entered with data items available to highlight on the right. Highlight any relevant piece of information on the page and select the correct schema item from the dropdown menu.
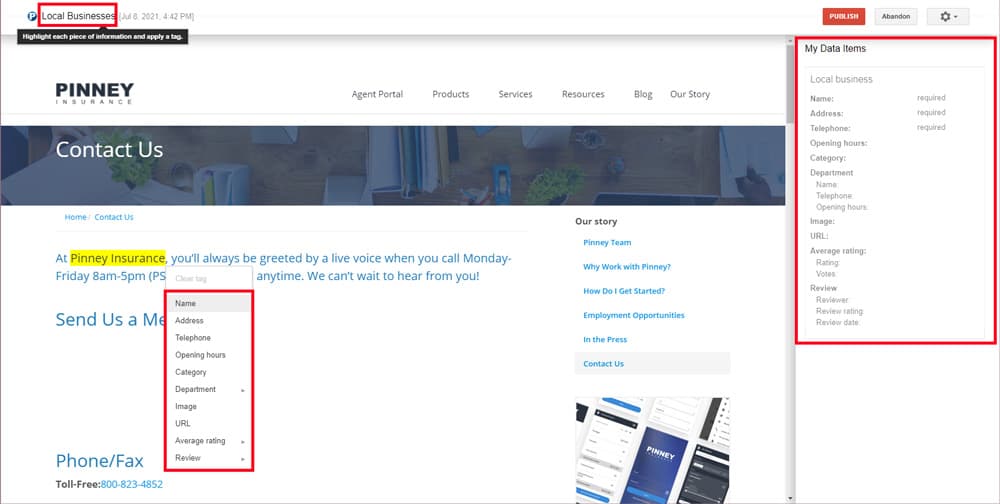
3. As you highlight items, you’ll see them appear in the collection panel on the right side of your screen. When you’ve highlighted all the relevant data, click the red Publish button at the top of the screen.
Pretty easy, right?
Mark Up Sample Pages & Have Google Do the Rest
If you selected multiple pages at the beginning of this session, Google will pull up random pages from your site. This is so you can mark them up and train the tool to auto-detect as many of these fields as possible throughout the rest of your site. If, for example, you’re marking up blog posts that all have the title and date in the same place, this will be easy. Google picks up on this quickly, and your sample pages will likely be filled in for you.
1. Make sure the pre-filled information is correct, and click the red Next button.
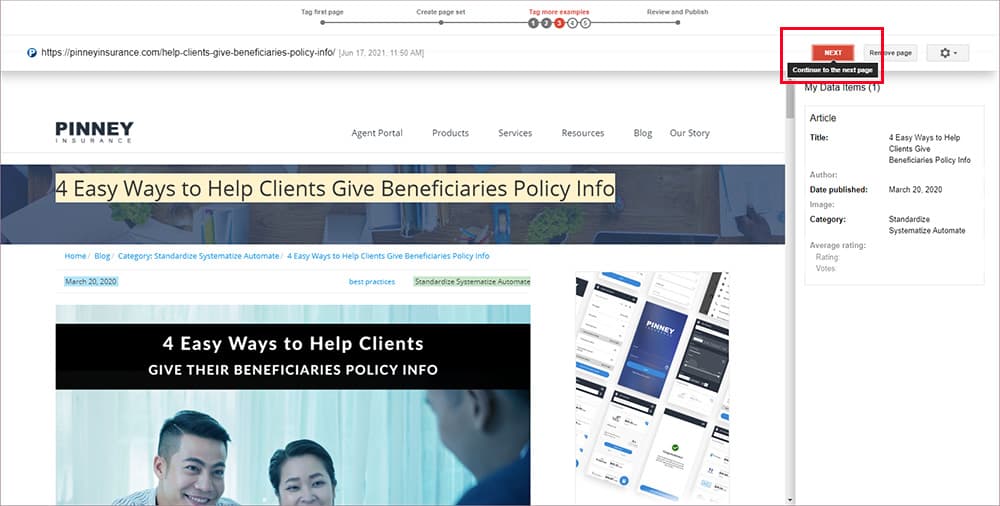
- See a page that doesn’t fit? Use the Remove page button to remove it from this page set. We did this when a quoter page came up that didn’t fit the page format and schema we were using for blog posts.
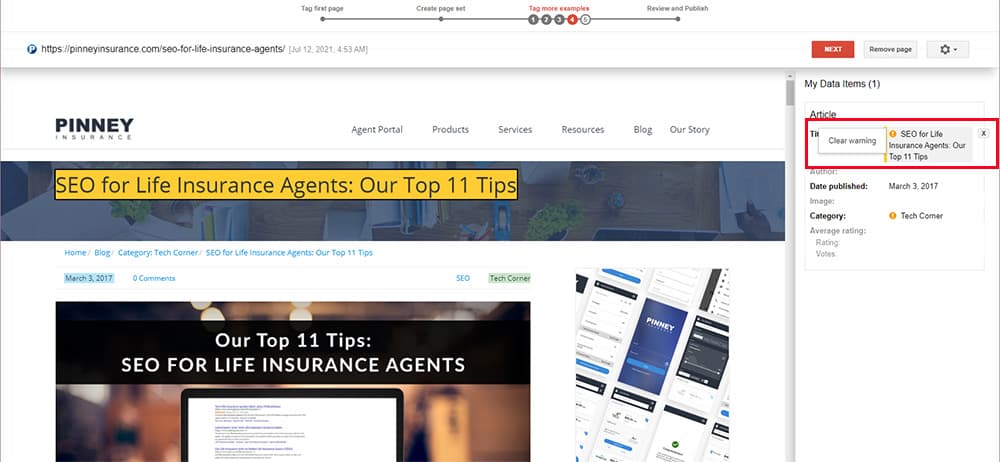
- See a yellow warning icon next to any schema information? For some reason, Google thinks this information is unusual and wants you to take a look. If it’s fine, click the icon and then click Clear warning.
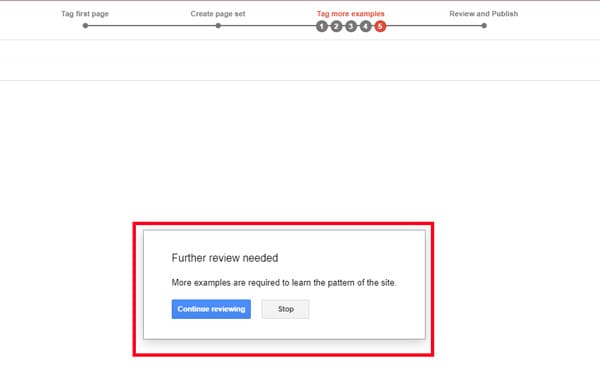
2. Continue through the sample pages Google selects. Once you’ve gone through 5 pages, Google will decide whether it understands your schema structure or needs a little more coaching. Ours needed a little more coaching, and we got the Further review needed message shown below.
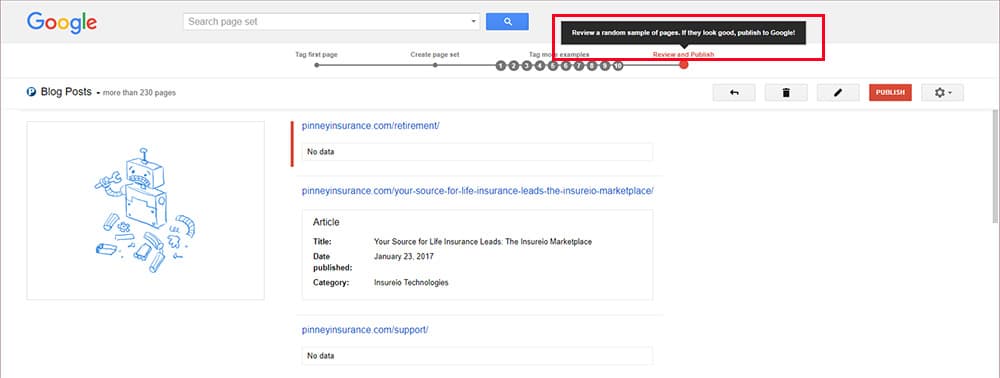
3. Once you've completed the additional pages and Google's tool better understands the page set you’re working on, you’ll see a message that says Review a random sample of pages. If they look good publish to Google!
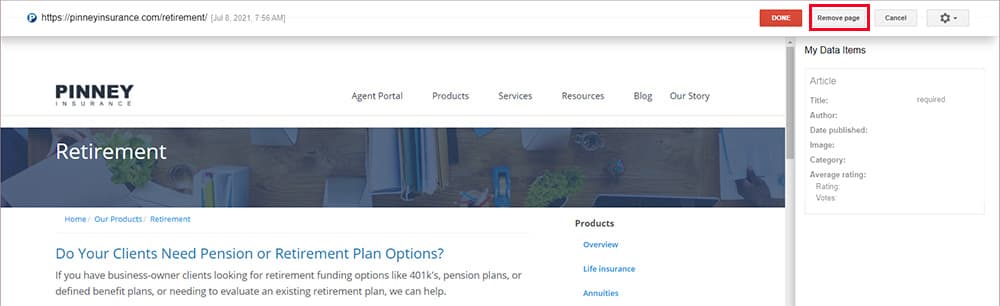
4. If you see pages that don’t belong in the page set (we did), you can remove them. Just click the page you don’t want to include and then click Remove page from the markup screen.
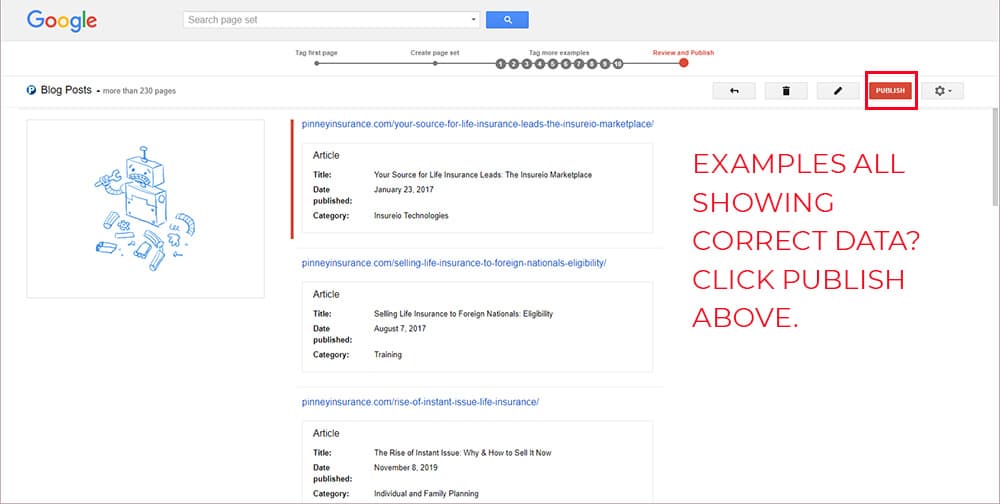
5. When your list of sample pages shows with the structured data correctly applied, click Publish.
Tips & Tricks
- This process is very format-dependent. We created one page set for our blog posts and a separate one for our static content pages because they have different formatting. The tool got confused because our static pages don't have a date and blog category assigned.
- Do you have guest posts on your site? You’ll want to mark those up individually. That way, you can tag the guest author’s name and not have that name applied to every page on your site.
- In order to include “product” schema for a page, the item must have a price – meaning, we can’t and shouldn’t try to mark up “life insurance” pages with the product schema.
Next Steps: Double-Check Your Markup
If you selected “this page and others like it,” go back into this tool a week or two after your initial markup. The point here is to make sure Google is still getting it right. In our case, we had to remove a few pages from one of our sets – no big deal.
But this isn't the only way to add schema information to your site. In a future post, we'll go over a couple other ways to do it that don't involve Google's automated tool. If you have trouble using the tool, don't want to use Google Search Console, or would rather just drop in some code and go, we'll show you how - and then look at how to check your work.
Final Steps: Ask Google to Recrawl Your Updated Page(s)
Now that your pages are updated and validated, it’s time to ask Google to recrawl them. The best way to do this is through Google Search Console. If you only want to recrawl a single page, Search Console is the only way to do it.
From your left-hand main menu, click URL Inspection Tool. If you’ve already added schema to quite a few pages, you’ll want to ask Google to recrawl your whole site. Type your domain name in the top search box and click Enter. If you’re taking it slow and updating one page at a time, enter the URL of the page you just changed.

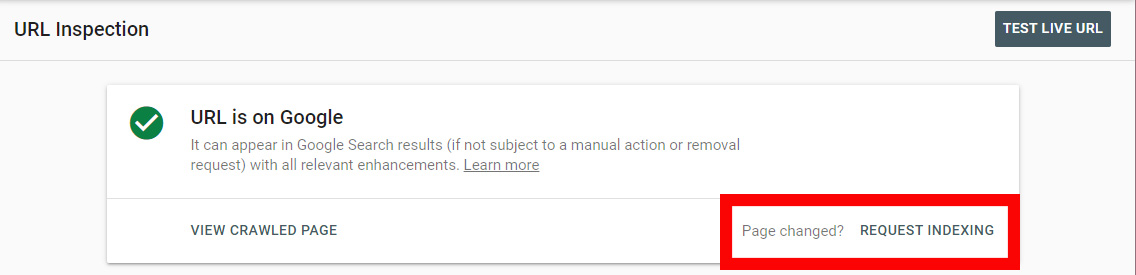
Google will analyze your input and, most likely, tell you that it’s already been indexed. Look for the Request Indexing link and click it, since you’ve made changes.
Sometimes indexing happens in as little as 30 minutes. If you made content-related changes to a page as well, indexing could take days or weeks.
That’s our look at how to boost your SEO and personal brand using schema!
As we mentioned, if you’re confident pasting schema into your source code or WordPress, you have more options available to you. We’ll cover those in a separate post - stay tuned!